Saturday, July 30, 2016

Molasses Spice Cookies

Last weekend, my hubby and I tried a new restaurant in Raleigh for brunch; it was wonderful.  Irregardless is located in the downtown area, but nestled in more a residential setting rather than a business site.  When we first sat down, they brought us freshly squeezed orange juice and a basket of homemade breads--biscuits to a spiced pumpkin bread.  We both reached for the biscuits first, but after I had finished most of my meal, I broke off a piece of the thinly sliced pumpkin bread and literally couldn't stop eating it!  Really, how embarrassing, I ate 3 thin slices which I decided equaled the size of a slab of bread I'd normally have:-D I love those flavors and it made me realize how much I look forward to autumn so I can bake using them.  However, I thought, why should I wait and decided to bake a cookie today that I know my hubby loves just as much as I do...and, since I'm traveling to Colorado tomorrow, I can take a gift bag with some cookies that I know my friends will love too.

Molasses cookies, with their cracked exterior counterbalancing the uncommonly moist, soft and chewy texture comes from using butter, not shortening and adding an egg yolk rather than a whole egg for tenderness.  When using molasses, it's important to balance that assertive flavor with strong spices--cinnamon, ginger, cloves, and allspice.  Additionally, I added ground white pepper since I sometimes do that in my gingerbread.  Rolling the balls of dough in Sanding Sugar gives the finished cookies a sweet crunchy coating.


Molasses Spiced Cookies
12 T (1 1/2 sticks) unsalted butter at room temperature
1/3 cup granulated sugar
1/2 cup firmly packed dark brown sugar
2 tsp. vanilla extract
1/2 cup light or dark molasses
1 large egg yolk
2 1/4 cups King Arthur all-purpose flour
1 tsp. baking soda
1 1/2 tsp. ground cinnamon
1 1/2 tsp. ground ginger
1/2 tsp. ground cloves
1/4 tsp. ground allspice
1/4 tsp. ground white pepper
1/4 tsp. Kosher salt

Preheat oven to 375F-degree.  Line two baking sheets with parchment and set aside.  Place 1/2 cup of Sanding Sugar in a shallow dish and set aside.

In a stand mixer, using the paddle attachment, cream the butter and sugars together until fluffy, about 3 minutes.  Add the molasses, vanilla and egg yolk and increase speed to medium to beat until incorporated, about 20 seconds.  Whisk the flour, baking soda, and spices together.  On low speed, add the flour mixture; beat until just incorporated.
The dough will seem a little sticky, but don't add more flour.  Use a rubber spatula to scrape down the sides of the bowl and make sure there are not "pockets" of flour remaining.

Use a tablespoon-size scoop and drop into the Sanding Sugar.  Roll the ball into the sugar to coat.  Space balls about 2 inches apart on the parchment-lined sheets.

Bake in the preheated oven for 10-11 minutes until browned, still puffy, and have begun to set, but the centers are still soft.  Do not over bake!
 Remove from the oven and let cookies set on the sheet for 5 minutes.  Transfer to a rack to cool to room temperature before serving (or storing!)

Needless to say, my kitchen smelled like autumn was around the corner even though it's 96F degrees here today.  Enjoy! 

Saturday, July 23, 2016

Peanut Butter Snickerdoodles

My mom baked peanut butter cookies and Snickerdoodles all the time, but never thought of combining these two flavors--my favorites.

Peanut Butter cookies date back to 1910 in the United States. George Washington Carver, an American agriculture educator who stressed that peanuts could replace the cotton crops that were damaged by Weevils for the farmers wrote a book, "How to Grow the Peanut and 105 Ways of Preparing it for Human Consumption" and in the book, there were three recipes for Peanut Butter Cookies.  However, it wasn't until 1932, published in the Schenectady Gazette that the criss-cross marks made with the tines of a fork appeared.  Pillsbury instructed cooks to do this because peanut butter cookie dough is dense and by pressing it with the fork, the cookie cooks more evenly.

Snickerdoodles are likely German in origin called Scheneckennudal.  Somewhat like a sugar cookie, except Cream of Tartar is substituted for baking soda and the cookie is rolled in a mixture of cinnamon and sugar.  Cream of Tartar, chemically referred as Potassium bitartrate, crystallizes in wine casks during the fermentation of grape juice.  Removing these crystals and straining through cheesecloth is called beeswing.  The white powder is used in many culinary and household purposes. It gives the "crunch" is these Peanut Butter cookies that are normally soft and chewy.

Peanut Butter Snickerdoodles
1/4 cup (4T) unsalted butter, at room temperature
1/2 cup granulated sugar
1/2 cup firmly packed light brown sugar
1 tsp. vanilla extract
3/4 cup smooth peanut butter
1 large egg
1 1/2 cups King Arthur all-purpose flour
1/2 tsp. baking soda
1/2 tsp. Cream of Tartar
1/2 tsp. Kosher salt

1/4 cup granulated sugar
1T cinnamon

Preheat oven to 350F-degrees.  Line baking sheets with parchment paper.  In a stand mixer, using the paddle attachment, cream the butter and sugars together for 5 minutes, until fluffy.  Add the peanut butter, vanilla, and egg and mix on medium until combines.  Scrape down sides of the bowl with a rubber spatula.  Add the dry ingredients and mix on low until combined; the dough will be stiff.

Form 1-inch balls from the dough and roll in the sugar/cinnamon mixture.
Place on the parchment lined baking sheet, about 2-inches apart.  Use a dinner fork to create the criss-cross pattern.  Bake for 10-12 minutes until brown.
These recipes makes almost 3 dozen.  Now, grab a glass of milk, take a bite and imagine you're a kid again coming home from school and mom has baked cookies.  Enjoy!

Monday, July 18, 2016

Sunday Dessert ~ Lemon Icebox Cheesecake

Just the word "Icebox" sounds perfect for these hot summer days.  First introduced during World War I,  the Icebox Cake is derived from similar desserts like a Trifle or Charlotte.  It became popular in the 20s and 30s because of the shortcuts and pre-made ingredients involved.  In fact, many cookie companies started printing directions for the IceBox Cake on the back of their packages.  I used the new Oreo Lemon Cookies as my base to give this dessert an even more lemony taste since the amount of lemon juice is "dialed back" on this icebox version because the heat of the oven in a baked cheesecake mellows the tartness of it.
My sister would agree that Mom made the best Lemon Glazed Cheesecake, but I have to say with the temperatures in the 90s and humidity higher, this icebox version is just as satisfying...just saying!

Lemon Icebox Cheesecake

Crust:
10 lemon sandwich cookies (you can use graham cracker crumbs too)
2 tsp. unsalted butter, melted
1 tsp. grated lemon zest

Preheat oven to 350F-degrees.  In a food processor, process cookies until finely ground. Add butter and zest and pulse until combined.  Press mixture into the bottom of a 9-inch springform pan, lightly sprayed with a baking spray.  Bake until lightly browned and set, about 10 minutes. Cool completely on wire rack, at least 30 minutes.

Lemon Curd:
1 large egg plus 1 large egg yolk
1/4 cup granulated sugar
pinch of salt
2 T lemon juice
1 T unsalted butter
1 T heavy cream

While crust is cooling, whisk the egg, egg yolk, sugar and salt together in a small saucepan.  Add lemon juice and cook over medium-low heat, stirring constantly, until thick and pudding like, about 3 minutes.  Remove from the heat and stir in butter and cream.  Press through fine-mesh strainer into small bowl and refrigerate until needed.

Filling:
1 envelop (2 3/4 tsp.) unflavored gelatin
1/4 cups lemon juice (approx 2 lemons)
1 tsp. lemon zest
1 1/2 lbs (3-8 oz) cream cheese, cut into 1-inch pieces and softened
3/4 cup granulated sugar
pinch of salt
1 1/4 cups heavy cream, at room temperature

Combine lemon juice and gelatin in a small bowl and let stand until gelatin softens, about 5 minutes.  Microwave until mixture is bubbling around edges and gelatin dissolves, about 30 seconds.  Set aside.

In a stand mixer, using the paddle attachment, beat cream cheese, sugar, and salt until smooth and creamy, scraping down the sides of the bowl with a rubber spatula, about 2 minutes.  Slowly add cream and beat until light and fluffy, about 2 minutes.  Add gelatin mixture and 1/4 cup curd, increase speed to medium high, and beat until smooth and airy, about 3 minutes.

Pour filling into cooled crust and smooth top.  Pour thin lines (mine were too chunky!) on top of the filling and lightly drag a paring knife or wooden skewer through lines to create marbled appearance.  Refrigerate until set, at least 6 hours.  Remove sides of the pan and serve.


Leftover cheesecake can be covered in plastic wrap and kept refrigerated for up to 3 days...if it lasts that long.  Enjoy!

Friday, July 15, 2016

June's Give-Away Apron...

Unfortunately, I've never heard from Optimistic Existentialist and so I have had to select a new winner for June's Give-Away Apron.  Congratulations Brenda!  Please email me your address and I will send your apron off to you ASAP!

Monday, July 11, 2016

Sunday Dessert

When we still lived in Maryland, about 15 minutes from my parents, every Sunday would find us at Mom's for dinner...it was a ritual.  I miss those days and wish our family was close enough to carry this tradition on.

Mom would make a big dinner and either I went over early to help with cooking and baking, or I brought the dessert.  Dessert changed seasonally from fruit pies, cakes, bread pudding, etc. and even though I'm not usually a cake person, I do like to surprise the family every now and again.  Chocolate would be my choice, but yesterday I went with a White Cake since I had been accumulating egg whites this past week.  I didn't have enough for Angel Food Cake, which is one of my hubby's favorites, but I did have enough to make my favorite white cake.  Of course, I had to elevate the flavor and split the layers to spread some homemade strawberry jam on and to top it off, I shaved bittersweet chocolate on the top.    I've discovered a fantastic white icing from King Arthur's Sift magazine and it was a perfect ending to our Sunday dinner.

White Cake with Fluffy White Buttercream Frosting
12 T (1 1/2 sticks) unsalted butter, at room temperature
1 1/2 cups granulated sugar
6 large egg whites
1/2 cup milk
2 tsp. Vanilla extract
2 cups King Arthur all-purpose flour
2 tsp. baking powder
1/4 tsp. salt

Preheat oven to 350F-degrees.  Spray 2--8 or 9-inch cakes pans, line the bottom with parchment paper and spray again with a baking spray.

In a stand mixer, using the paddle attachment, cream the butter and sugar until light and fluffy--about 5 minutes.  Scrape down the sides of the bowl and add the vanilla extract.  Mix once again.

Mix the dry ingredients together.  Whisk the egg whites and milk together to combine.  Add the flour mixture and milk mixture alternatively, starting and ending with the flour mixture.  Beat one minute more.

Divide the batter evenly among the cake pans.  Bake in the preheated oven 28 to 32 minutes or until the tops spring back when touched with your fingers and the cake starts to pull away from the sides of the pan.  Remove from the oven and cool about 5 minutes, then invert onto parchment-lined racks to cool completely.

Fluffy White Buttercream Frosting
3/4 cup granulated sugar
1/4 tsp. salt
1/2 cup boiling water
1/4 cup meringue powder
1 T vanilla extract
4 cups sifted confectioners' sugar (icing sugar)
2 cups (4 sticks) unsalted butter, at room temperature

In a large mixing bowl, dissolve the sugar and salt into the boiling water.  Cool to room temperature.  Add the meringue powder and use to mixer to beat on slow speed for several minutes, until the powder is dissolved and the mixture is foamy.  Increase the speed and beat until soft peaks form.

Beat in vanilla, then the confectioners' sugar.  Add the soften butter a few tablespoons at a time, berating well after each addition.

Once the cake was cooled completely, I split the layers with a serrated knife.  I piped a border around the first layer so the strawberry jam would not ooze out and mix with the frosting.  Then, I set the top layer on and spread the buttercream frosting on it.  I repeated the jam between the second layer as I did with the bottom one.  Finally, I frosted the entire cake and even had enough to add some decorative borders.  I had a bar of bittersweet chocolate that I had soften slightly in the microwave (only about 7-10 seconds), then I used peeler to shave some chocolate on top.
Adding details to your baked goods makes all the difference!  My grands are coming in August and I've told them we'll celebrate their birthdays then since we can't seem to get together on their actual dates.  They will be able to each choose what cake they want just like I was able to growing up.  (Invest in some 6-inch cake pans and this is a fun way enjoy a variety of cakes).  What is your favorite cake? Enjoy!

Saturday, July 9, 2016

Iced Maple~Molasses Cookies & July's Give-Away Apron

It's so hot here (95-degrees with a heat index of 102) that my baking transported me to cooler days and I created a recipe reminiscent of Autumn!  These cookies are scented with ginger, cinnamon, cloves and the tastes of molasses and maple--a cookie I would normally bake for the holidays.

Not to make light of disasters, but on January 15, 1919, in the North End of Boston, a molasses storage tank burst and the streets were flooded with this thick, sticky substance.  It flowed through the streets at 35 miles per hour and killed 21 and injured 150 people.  For several decades, there was a folklore that on hot summer days, the area smelled of molasses!  Well, that's how my kitchen smelled yesterday:-D

Iced Maple~Molasses Cookies
1 cup (2 sticks) unsalted butter, at room temperature
1/2 cup Grade B Maple Syrup
1/2 cup Molasses
2 large eggs
1 tsp. vanilla extract
4 3/4 + 3T cups King Arthur All-Purpose Flour
1/2 tsp. baking soda
1/4 tsp. salt
1 T ground Ginger
2 tsp. ground Cinnamon
1/2 tsp. ground Cloves
1/2 tsp. ground Cardamon
1 cup finely chopped almonds

Preheat oven to 350F-degrees.  Line two baking sheets with parchment paper.

Cream the butter thoroughly.  Add the maple syrup and molasses and beat together, scrapping down the sides of the bowl with a rubber spatula.  Add the eggs, one at a time--the mixture will appear "curdled."  Add the vanilla and mix well.

Add the remaining ingredients and mix on low to incorporate.  The dough will be somewhat stiff.
Form the dough into balls the size of a large walnut or ping-pong ball;-)  Place the balls on the parchment paper and using a cookie stamp, lightly dipped into flour, press a design in the cookies.  The cookie should be about 3-inches in diameter.

Alternatively, you could use a fork to cross-hatch a design (like peanut butter cookies).  Place the cookies in the preheated oven and bake for 12 minutes.  Remove from the oven and transfer to a rack to cool.
 Icing:
1 1/2 cups confectioners' sugar (icing sugar)
1 T light Karo syrup
1-2 T very hot water
1/4 tsp. almond extract

While the cookies are warm, use an off-set spatula to spread the icing on top of the cookies.


These cookies were so good with a glass of Iced Tea or, as my hubby had, a tall glass of Lemonade.  Enjoy!

Now, the new apron that will be given away at the end of the month also reflects how hot it is here.  This fabric just jumped out at me in one of my favorite quilt shops!
My Kelly loved the color orange and I think she would approve of my choice.  If you would like to win this apron, just comment on any of the posts this month.  Good Luck!

To put a smile on your face, here's a photo of a squirrel relaxing on one of the Adirondack chairs on the deck.  Since I don't bake with preservatives, the wildlife around here eat pretty good.  This guy has a chunk of bread while stretched out--what a life!

Tuesday, July 5, 2016

Patriotic Pie and June's Give Away Apron Winner

July 4th was always a special holiday growing up.  My mother spent a few days cooking and planning a picnic, not just for family, but as years went by, friends too were part of the celebration.  My dad would buy Chesapeake Bay Blue Crabs and mom would add fried chicken, an assortment of salads, corn on the cob, rolls, and many desserts--pies, cakes, brownies.  I miss those picnics.

It was a rainy day yesterday, but that didn't stop me from preparing a very patriotic dessert I had seen on the King Arthur Flour recipe website.  The only difference is that my "Red" section was strawberries and raspberries (instead of Strawberries and Rhubarb).  I made a Vanilla Bean Ice Cream and this dessert was spectacular.  My mother would have been impressed.

Patriotic Pie
Pie Dough:
2 3/4 cups King Arthur All-purpose Flour
1 tsp. salt
4 tsp. sugar
1/2 tsp. baking powder
3/4 cup cold unsalted butter, cut into 1/2-inch pieces
1/2 cup cold butter-flavored shortening, cut in 1/2-inch pieces
6-8 T ice cold water

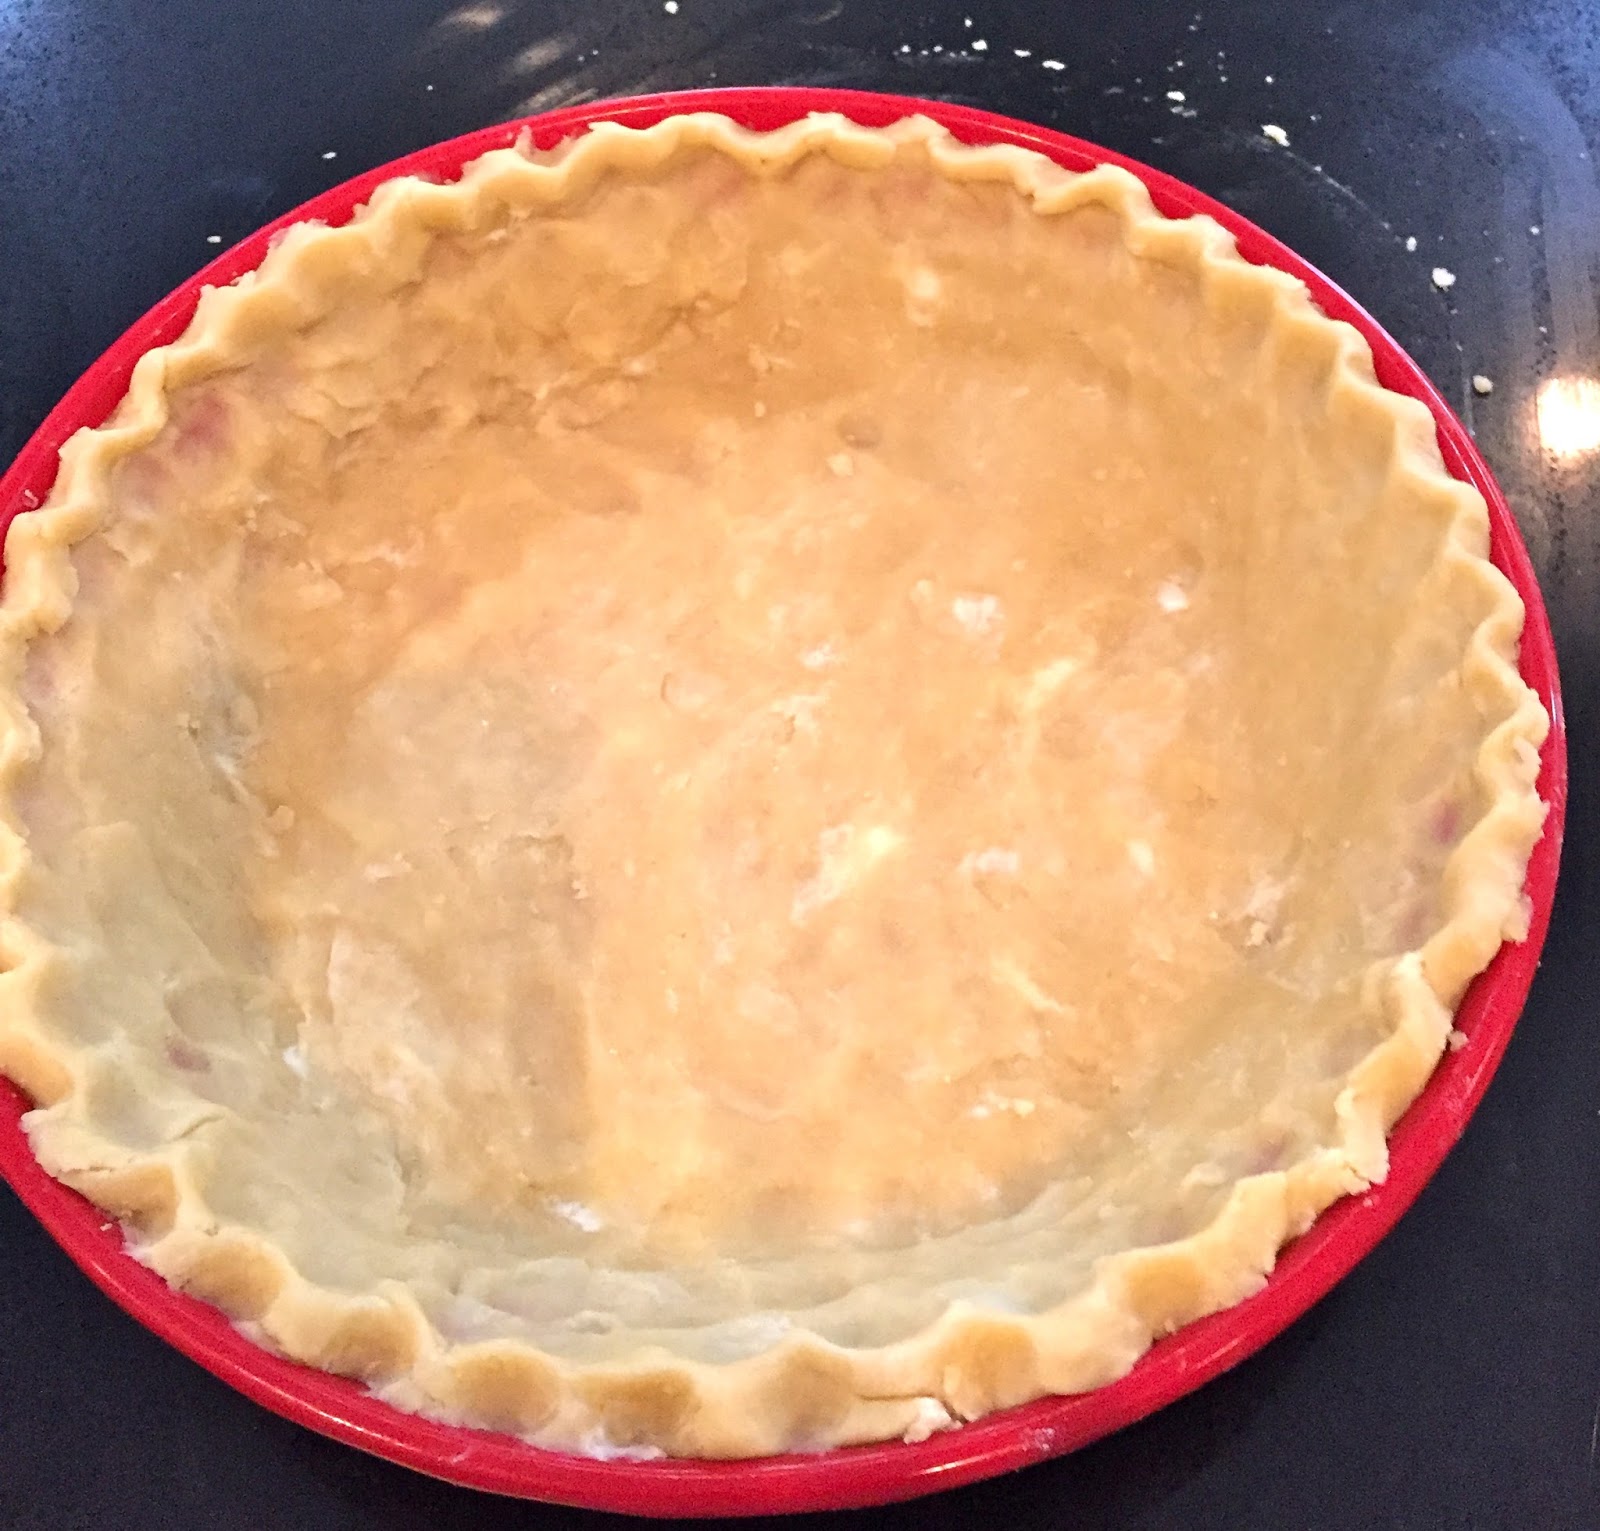
In a food processor, pulse the dry ingredients together.  Then, add half of the butter and shortening pieces and pulse until the mixture resembles coarse sand.  Add the remaining butter and shortening and pulse again.  Pour mixture into a large bowl and add 4-6 T ice cold water and using your hands start to bring the mixture together, adding more water as needed.  Turn dough out onto a board and divide in half.  Wrap each half in plastic wrap and chill about an hour.

When dough is thoroughly chilled, roll out and place in a 9-inch pie plate.  Return to the refrigerator to chill while you prepare the fruit.

Fruit:
Strawberries 4 cups
Raspberries 1 cup
Blueberries 2 cups

Wash, dry and slice the strawberries.  Wash and dry the raspberries and blueberries.  Place the Strawberries and Raspberries in one bowl and add:

2/3 cup granulated sugar
2-3 T Cornstarch (or Instant Clear Jel)
juice of 1/2 lemon

Blueberries in another bowl and add:

1/2 cup granulated sugar
2 T Cornstarch (or Instant Clear Jel)
juice of 1/2 lemon


Preheat oven to 425F-degrees.  Use a piece of aluminum foil to create a barrier for the red and blue.
Add the blueberries in the upper left corner and the strawberries/raspberries in the larger section.
Take out the second half of dough and roll out.  Create stripes and stars to decorate the top of the pie.
Yes, I made sure I had "13" stripes of dough and berries!  Brush the top dough with water and sprinkle with sugar.  Bake pie on a baking sheet, to prevent spillage. Place pie in the preheated oven and bake for 20 minutes.  Lower temperature to 375F-degrees and continue baking 45-60 minutes or until the berries have released their juices and the pie is browned and bubbly.  If the edges start to brown to quickly, make an aluminum foil "collar" to protect it.
Now, all this pie needed was a good vanilla ice cream.  My recipe has only 5 ingredients and is easy to do.

Vanilla Bean Ice Cream
2 cups heavy cream
1 cup whole milk
3/4 granulated sugar
2 large eggs
3 vanilla beans

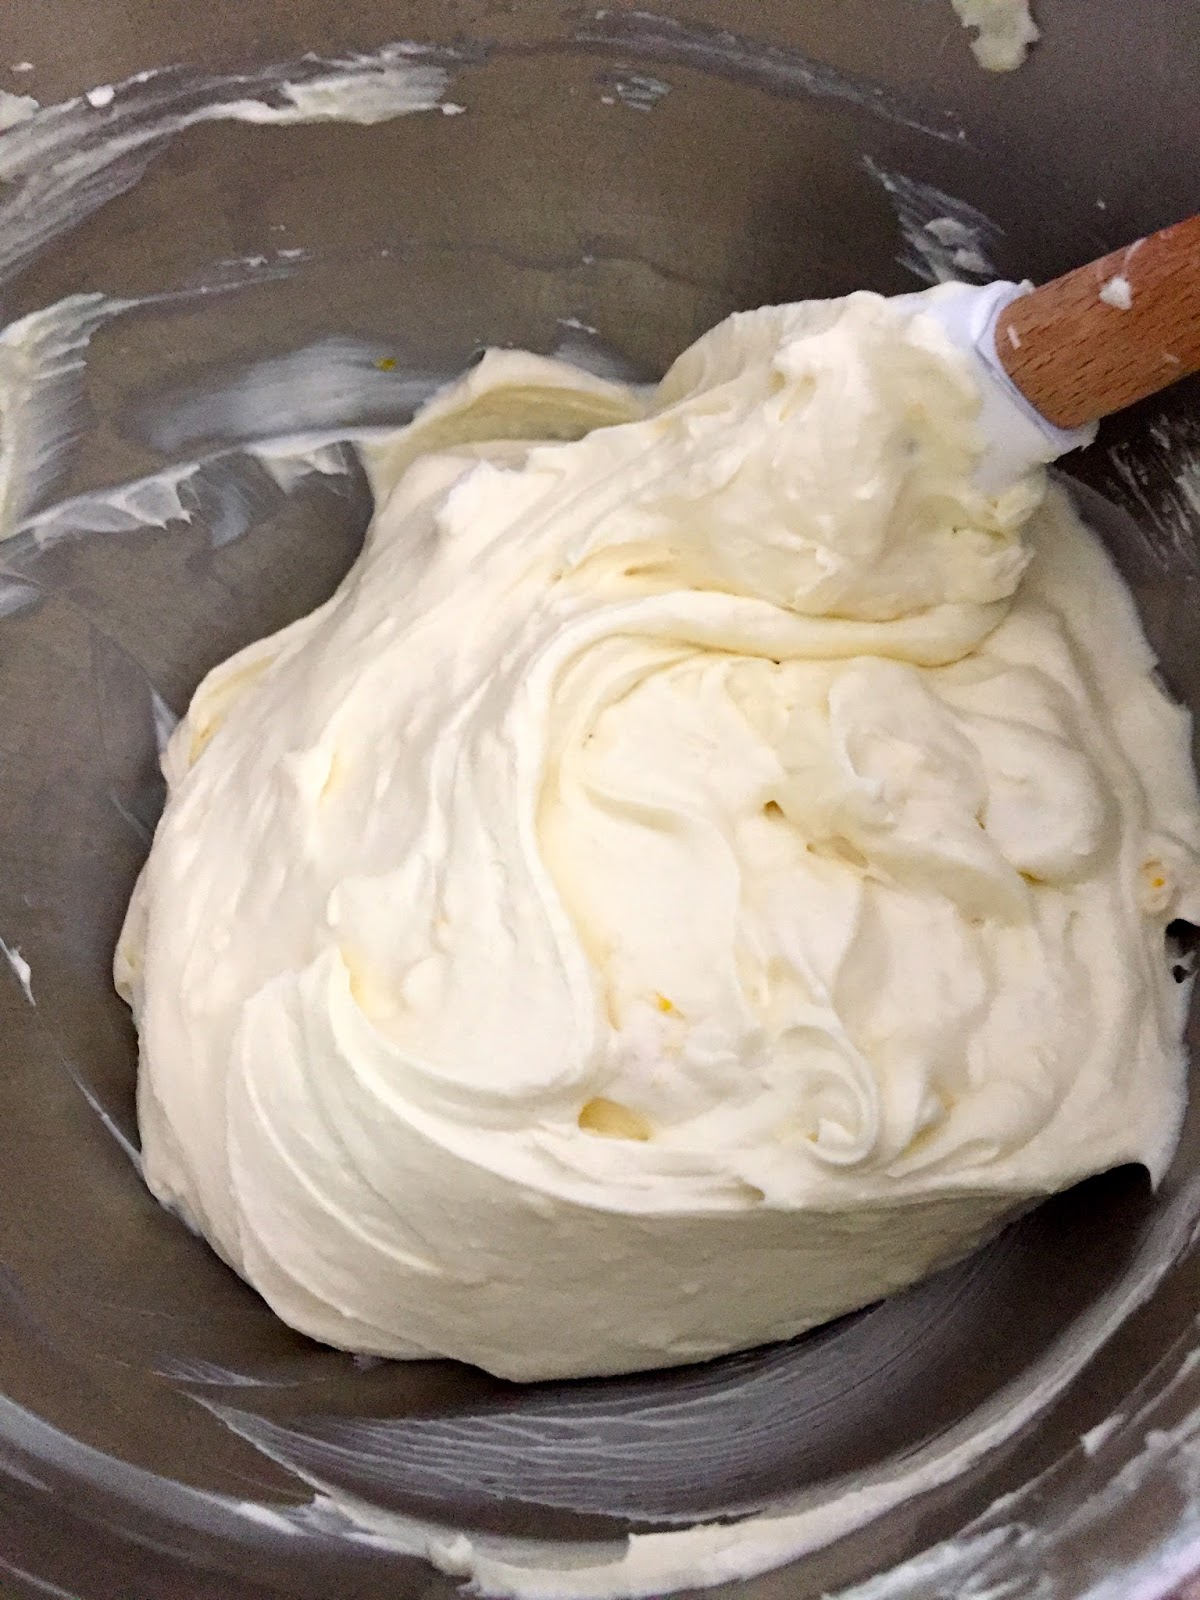
In a medium saucepan, heat the cream, milk, and sugar. Scrape the 3 vanilla beans and add to this mixture.  Bring to a boil.  In a separate bowl, whisk the eggs.  Add hot milk mixture to the eggs, a small amount at a time to temper the eggs, whisking well after each addition.  Add the egg mixture to remaining milk and cream mixture and heat until the temperature is 170F-degrees.  Remove from the heat and pour into a bowl, using a strainer to catch any pieces of cooked egg.  Chill mixture about 3 hours, then pour into an ice cream freezer for about 20 minutes or until thickened.  Place mixture into a container to chill thoroughly in the freezer until ready to use. Enjoy!


Now, for Winner of June's Apron...Optimistic Existentialist!  Please email me your address and I will send this apron off to you ASAP.    July's apron will be up by tomorrow and you will have a chance to win it by posting a comment on any of the posts.  Good Luck~